Chocolate Cereal Bars
This content may contain affiliate links. For more information, see our disclosure policy.

These no-bake chocolate cereal bars are crunchy, chewy, and packed with rich cocoa flavor. They’re a quick and easy treat that are perfect for lunchboxes, snacks, or satisfying your sweet tooth.

When life gets hectic and you need a sweet treat fast, chocolate cereal bars are one of my go-to solutions. They come together in minutes, require no baking, and use simple ingredients I almost always have on hand. Whether you’re making them for an after-school snack or a quick dessert, these bars are a crowd-pleaser every time.
I first made these when I was craving something chocolatey but didn’t want to turn on the oven. I tossed together some cereal, marshmallows, and butter. And just like that, a new favorite was born. Since then, they’ve become a regular in my household, especially when I need something quick to bring to a potluck.
What I love most is how versatile they are. You can use different cereals, mix in nuts or dried fruit, or drizzle a little extra chocolate on top if you’re feeling fancy. But even in their simplest form, chocolate cereal bars strike the perfect balance of chewy, crunchy, and sweet. Once you try them, I think you’ll find yourself coming back to this recipe again and again.
Items Needed
Here’s what you’ll need to make these chocolate cereal bars:
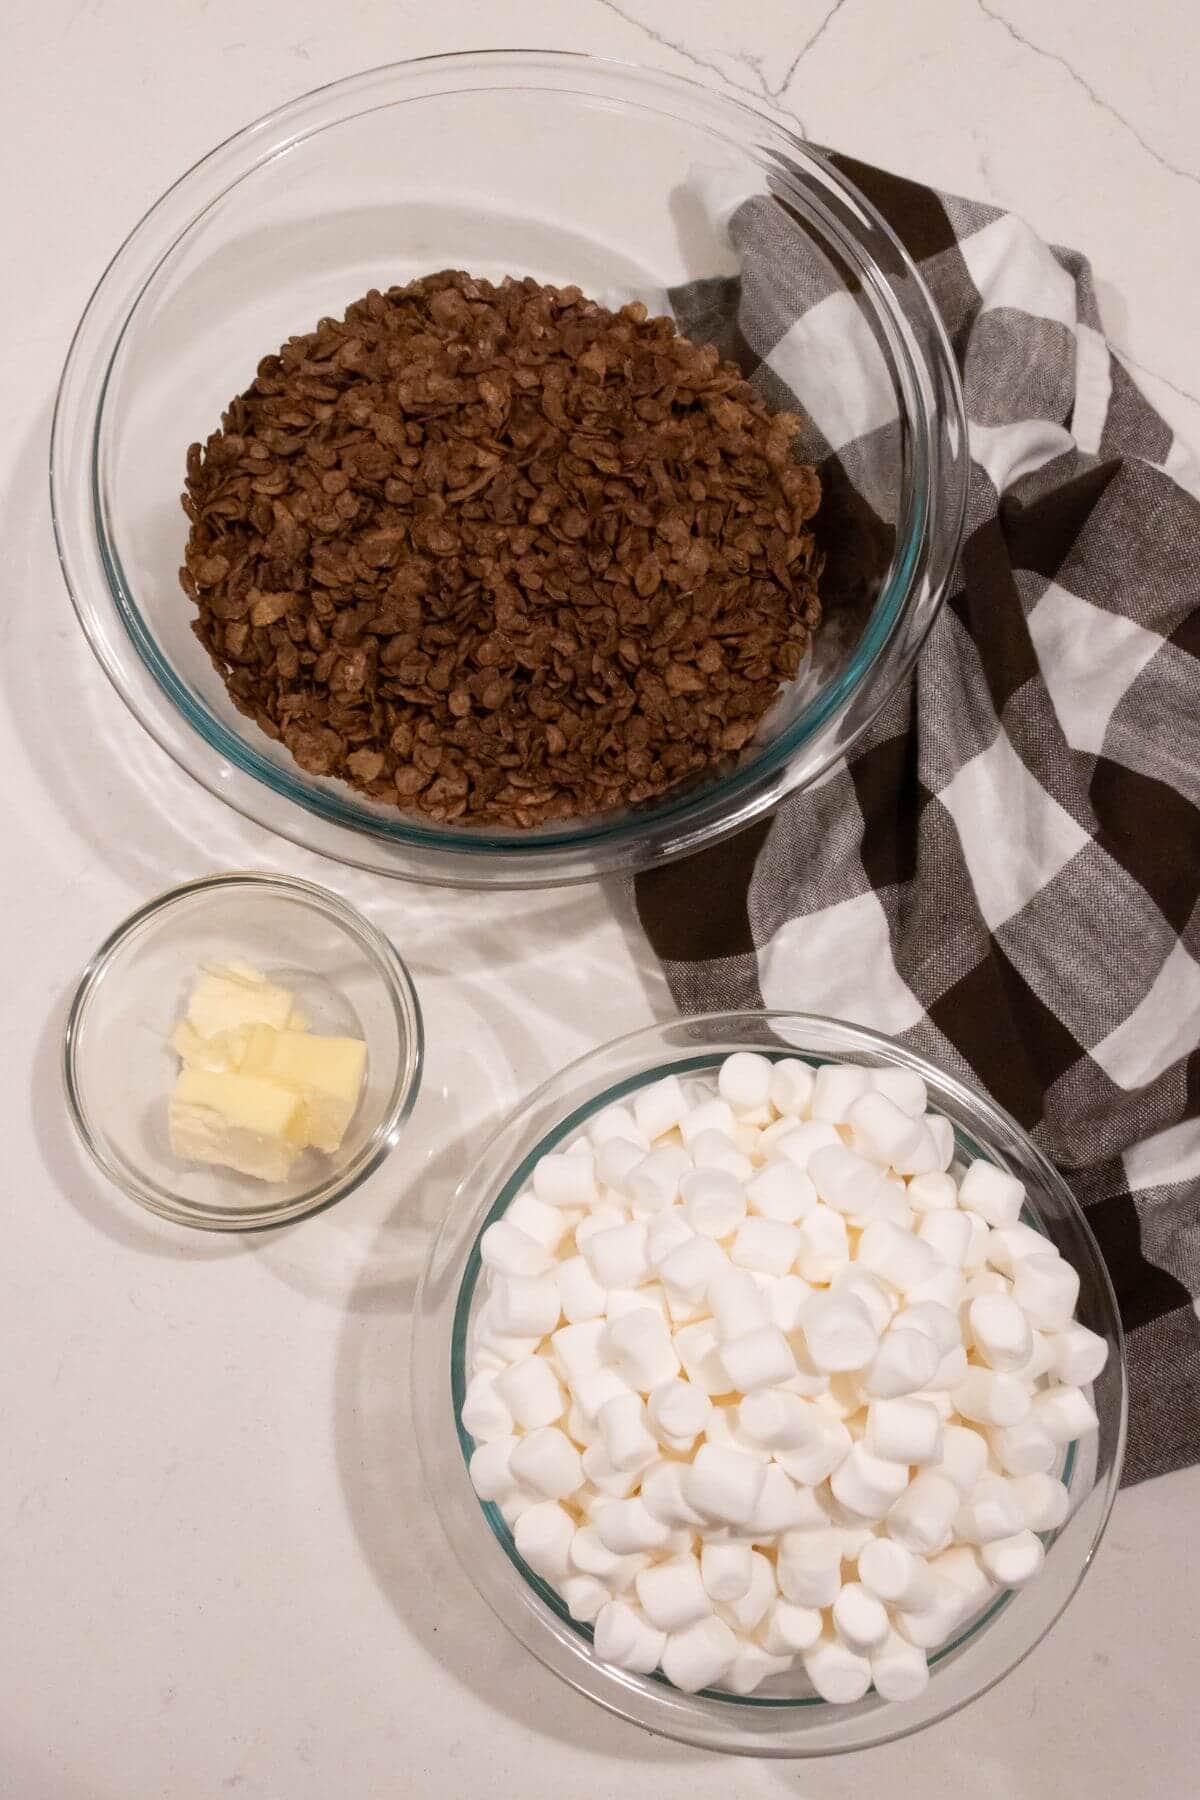
- Butter – Adds richness and helps melt the marshmallows smoothly for better binding. (If you’re looking to make these dairy free, you can use oil in place of butter.)
- Marshmallows – The sweet, sticky binder that holds the bars together.
- Cocoa Pebbles – Provide chocolate flavor and a crispy texture that’s key to the bars.
Tools you’ll need
Before starting the recipe, you’ll want to have all your kitchen essentials ready. I recommend having the following items:
Ways To Customize
Here are some easy ways to customize this chocolate cereal bar recipe:
- Add mix-ins – Stir in mini chocolate chips or sprinkles.
- Drizzle or dip – Once set, drizzle the bars with melted white chocolate, peanut butter, caramel, or icing for a fun twist.
- Change the cereal – Swap Cocoa Pebbles for Rice Krispies, Cheerios, or any other crisp cereal you like.
- Make them festive – Add seasonal sprinkles or colored candy for holidays and parties.
- Use flavored marshmallows – Try strawberry, vanilla swirl, or other flavored marshmallows for a subtle flavor change.
- Cut into shapes – Use cookie cutters to make fun shapes for kids or themed events.
Be sure to check out the full recipe and ingredient list below.
How To Make It
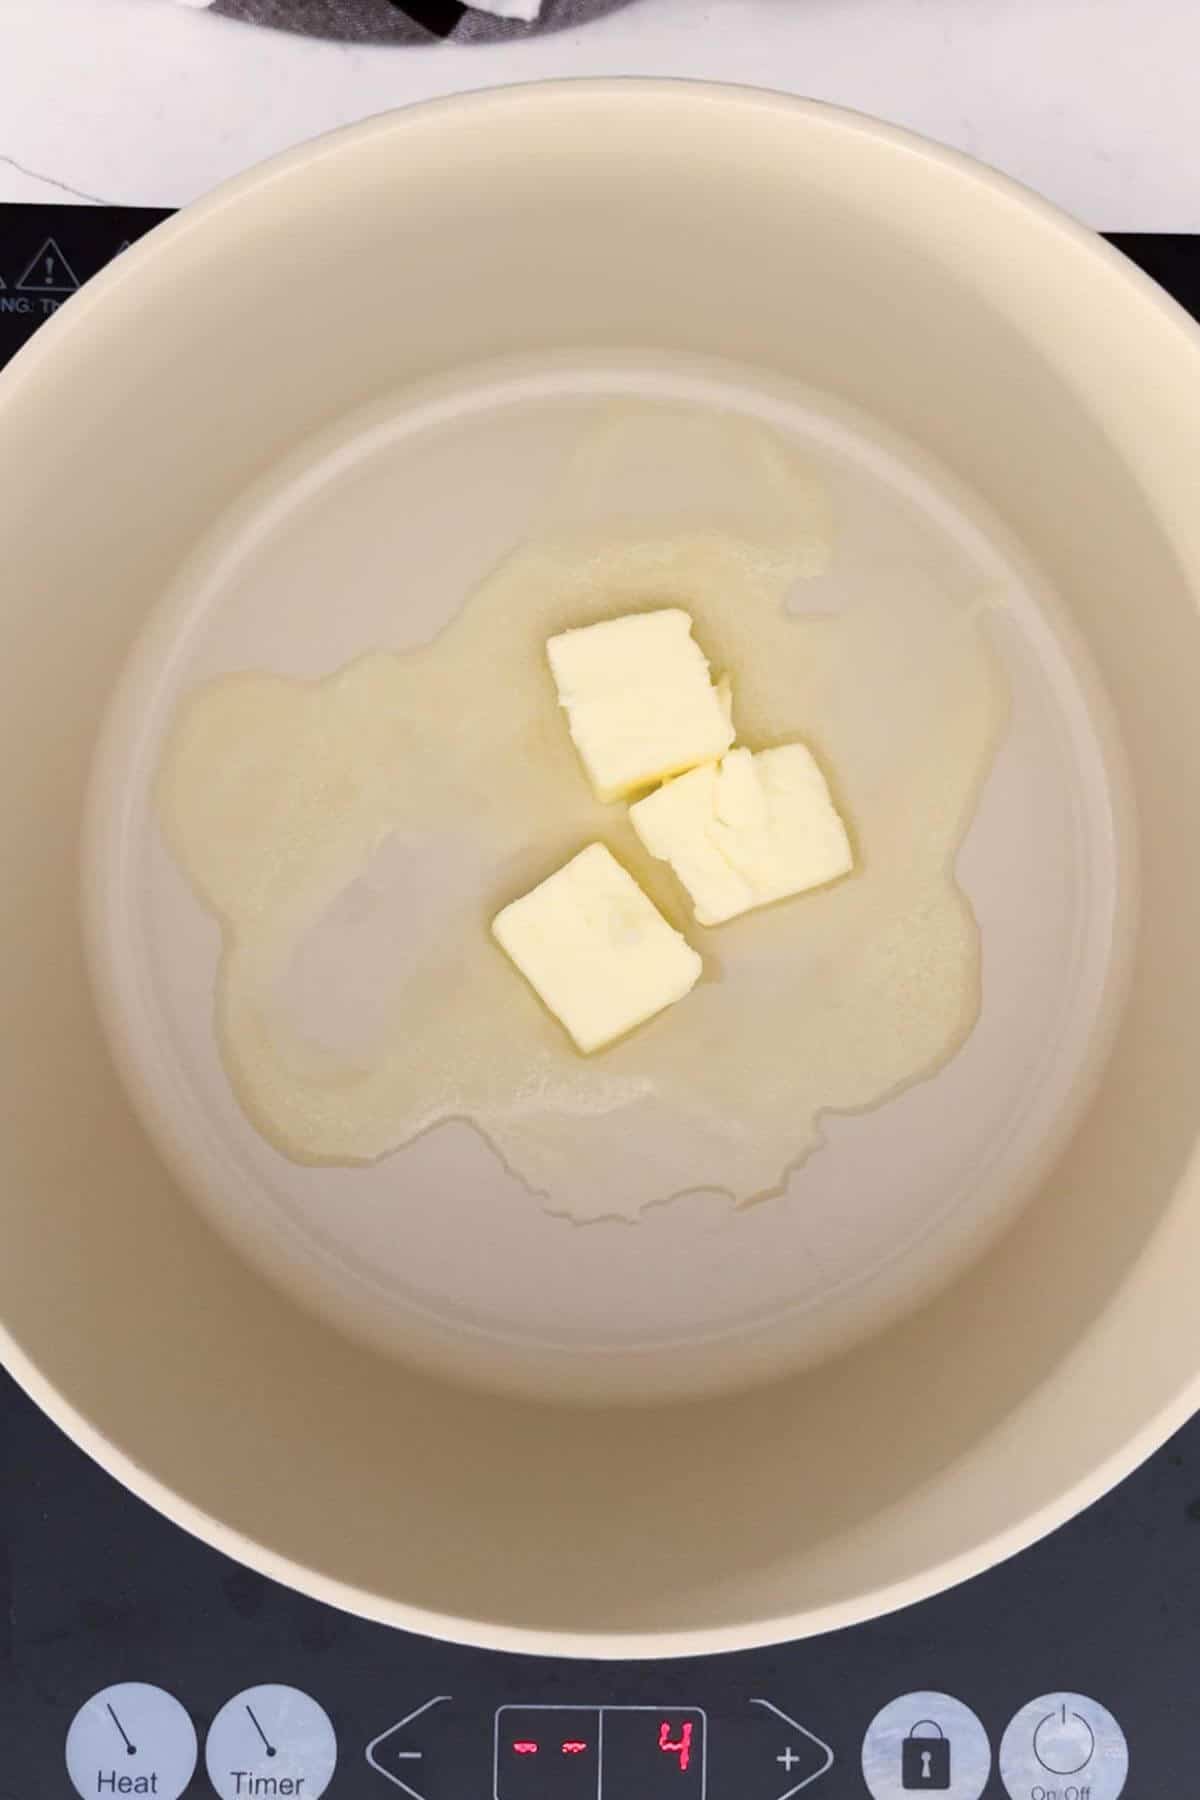
Melt butter on low heat.

Add marshmallows and stir until completely melted.
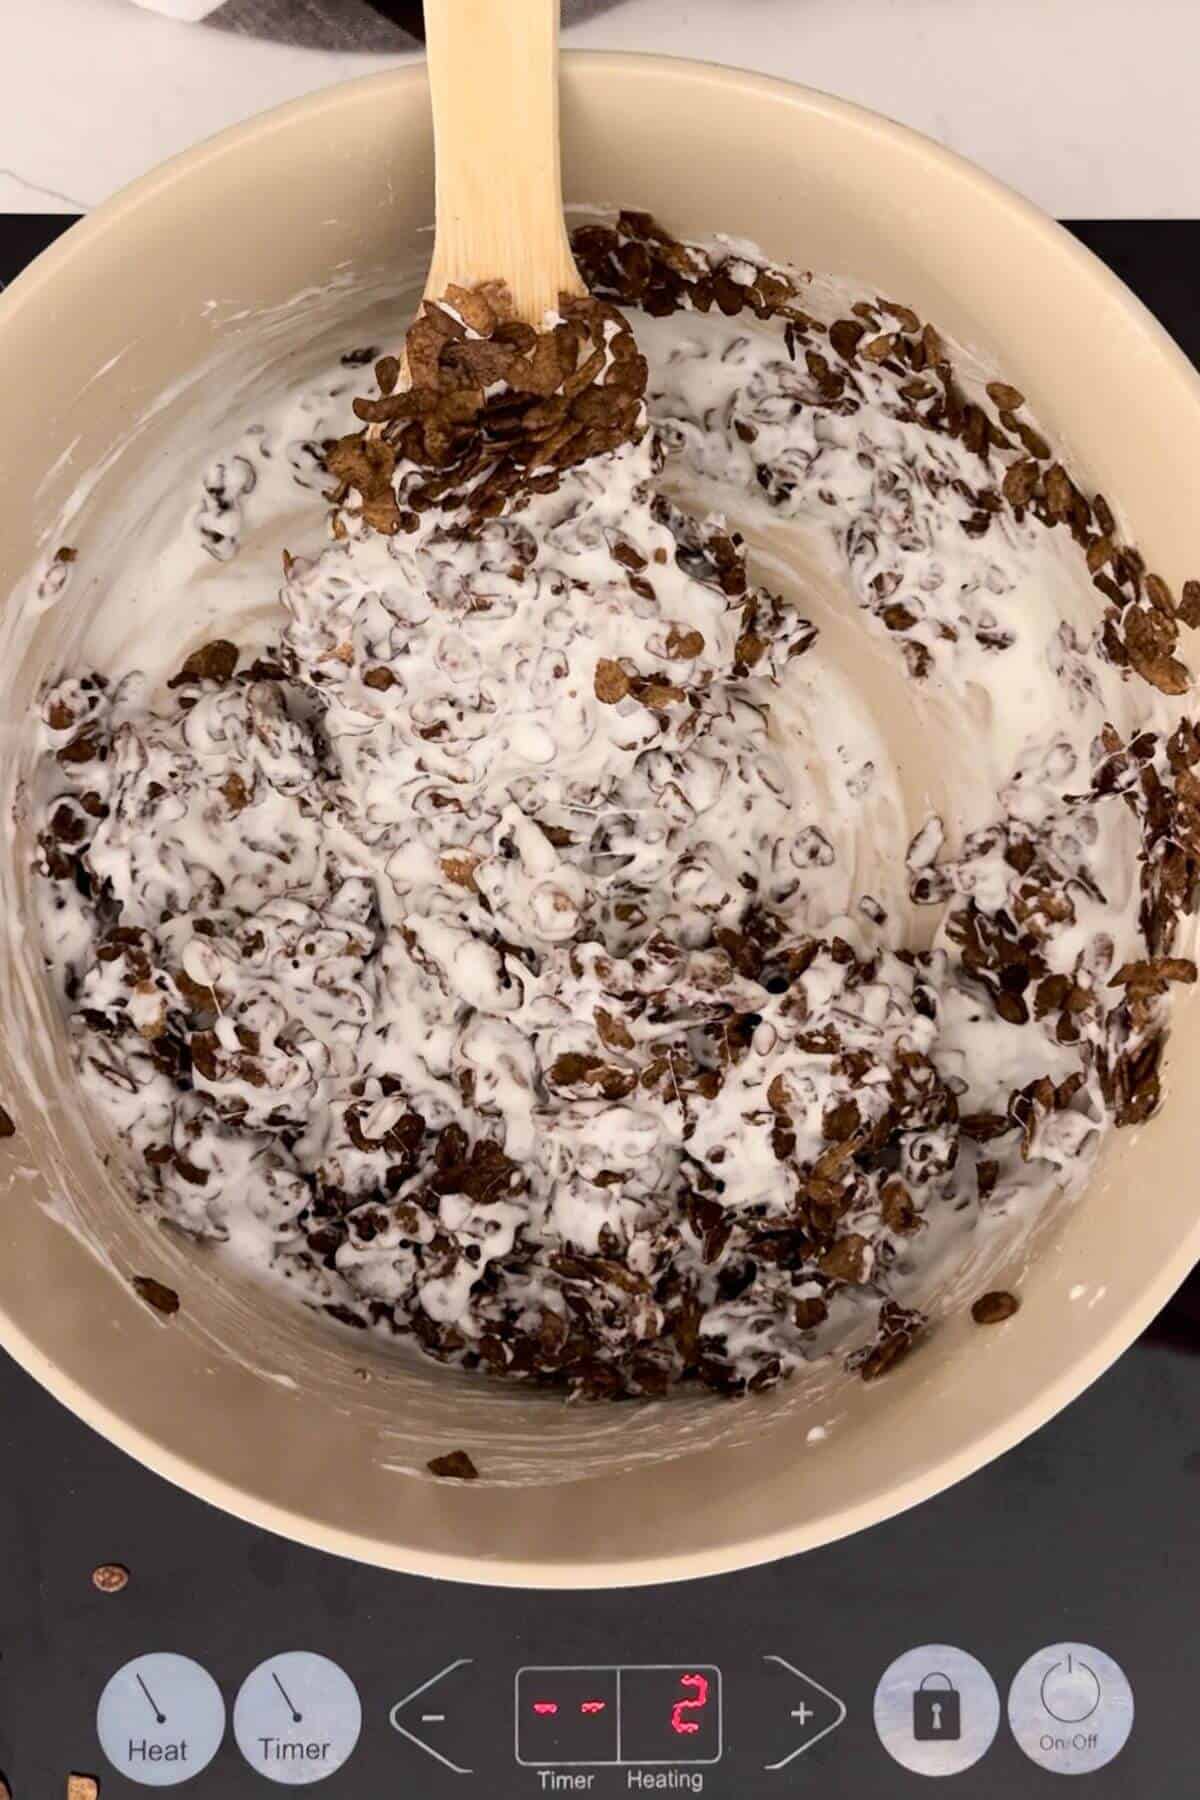
Add in the cereal.

Stir until well coated with melted marshmallows.

Put into a greased pan.
Note
Work quickly when mixing the cereal and marshmallow mixture—once it cools, it becomes harder to stir and press into the pan evenly.

Storage
To store chocolate cereal bars, let them cool completely and then cut them into squares. Place the bars in an airtight container, separating layers with parchment paper to prevent sticking. They can be kept at room temperature for up to 3 days or refrigerated for up to a week.
Reheating usually isn’t necessary since they’re meant to be enjoyed as-is, but if you prefer them slightly softer, you can microwave an individual bar for about 5 seconds—just enough to warm it without melting.
Helpful Hints
Pro tip: Grease Before Pressing!
This will help you remove them from the baking dish you shape the bars in. If you don’t grease the pan, you’ll have a difficult time getting them out. I typically use spray oil, but you could also use butter.
Here are more helpful hints:
- Use fresh marshmallows for the best melt and texture—stale ones won’t give you the same soft, gooey result.
- Don’t overheat the marshmallows or the bars may turn out hard instead of chewy.
- Press gently, not firmly, when shaping the bars to keep them light and chewy, not dense.
- Line your pan with parchment paper for easy removal and cleanup.
- Let the bars cool completely before cutting to help them hold their shape.

Serving Suggestions
Chocolate cereal bars are perfect for quick snacks or easy desserts, especially when you need something on the go. Pack them into lunchboxes, picnic baskets, or road trip snack bags for a no-mess treat that everyone will enjoy.
They’re also great for after-school bites or when you want to satisfy a sweet craving without reaching for store-bought options. And if you’re looking for more simple recipes that hit the spot, try my Sweet Potato Hash for something savory or Stewed Pears for a cozy, fruit-based dessert.
These bars make a fun addition to party dessert tables or holiday treat trays. Cut them into bite-sized squares or use cookie cutters for festive shapes, then add colorful sprinkles or a drizzle of chocolate to match the theme. You can even wrap individual bars in parchment and tie them with twine for a cute, homemade party favor or gift.
For an extra special treat, serve them warm with a scoop of vanilla ice cream or a dollop of whipped cream. If you’re a fan of sweet-and-salty combos, pair the bars with popcorn or pretzels on a snack board. However you serve them, chocolate cereal bars are a fun, flexible dessert that’s easy to dress up or keep simple.
FAQs
Recipe

Chocolate Cereal Bars
Ingredients
- 3 tablespoons butter you can use oil in place of butter to make it dairy free
- 10 ounces marshmallows
- 6 cups Cocoa Pebbles
Instructions
- Melt butter on low heat
- Add marshmallows and stir until completely melted
- Add in the cereal
- Stir until well coated with melted marshmallows
- Put into greased pan