Easy Cheese Stuffed Biscuits
This content may contain affiliate links. For more information, see our disclosure policy.

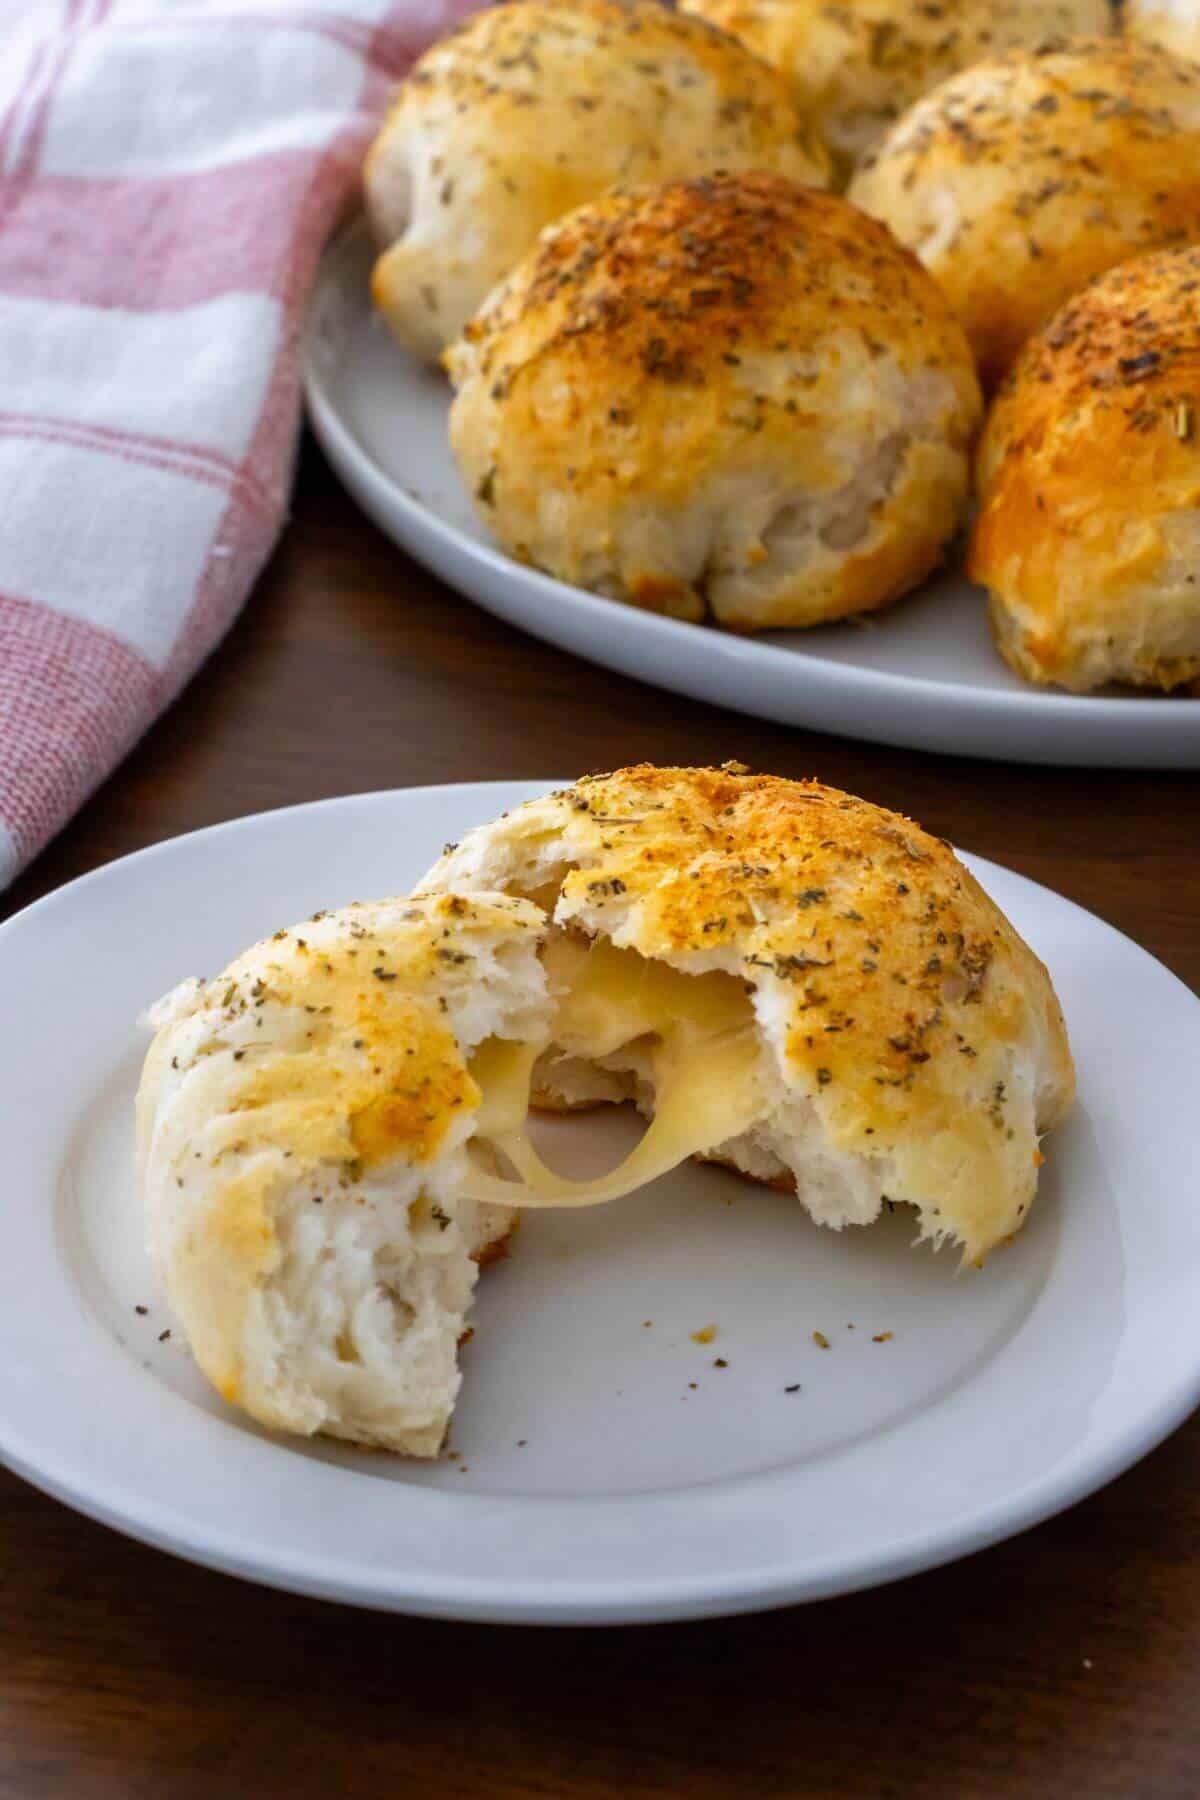
Cheese stuffed biscuits are soft, buttery, and baked with a warm, melty cheese center in every bite. Perfect as a side, snack, or brunch favorite that feels homemade without the fuss.
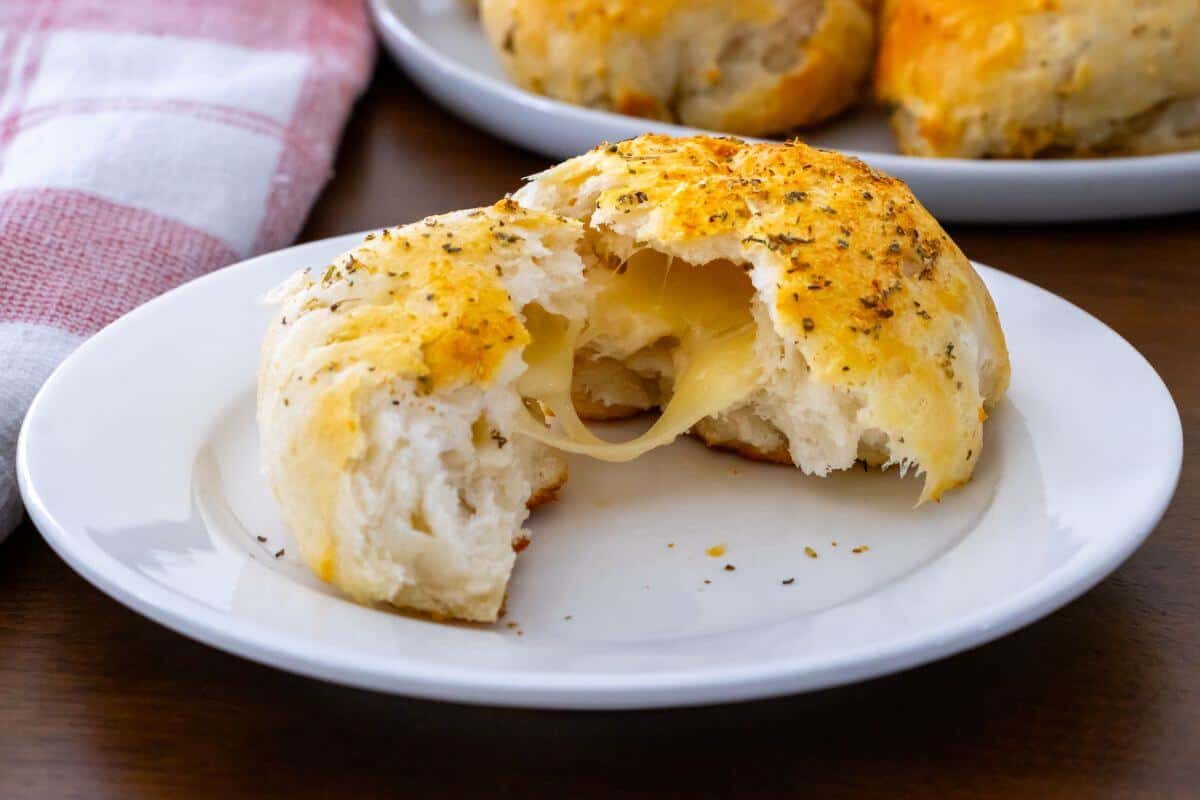
I’ve always had a soft spot for biscuits, especially the kind that come out of the oven warm, buttery, and impossible to ignore. These cheese stuffed biscuits are one of those recipes I make when I want something comforting but still a little special. The moment you pull them apart and see that melty cheese inside, you know they’re going to disappear fast.
I started making these on days when I wanted homemade bread without committing to a long baking project. They’re simple, reliable, and don’t require fancy ingredients, which makes them perfect for busy days or last-minute meals. I’ve served them with soups, alongside dinner, and even on their own as a snack, and they never feel out of place.
What I love most is how approachable this recipe is, even if you’re not confident in the kitchen. I’ve made these for family gatherings, quiet weekends, and everything in between, and they always get the same reaction. If you enjoy cozy, homemade food that feels worth the effort but doesn’t demand too much time, these biscuits are exactly that kind of win.
Items Needed
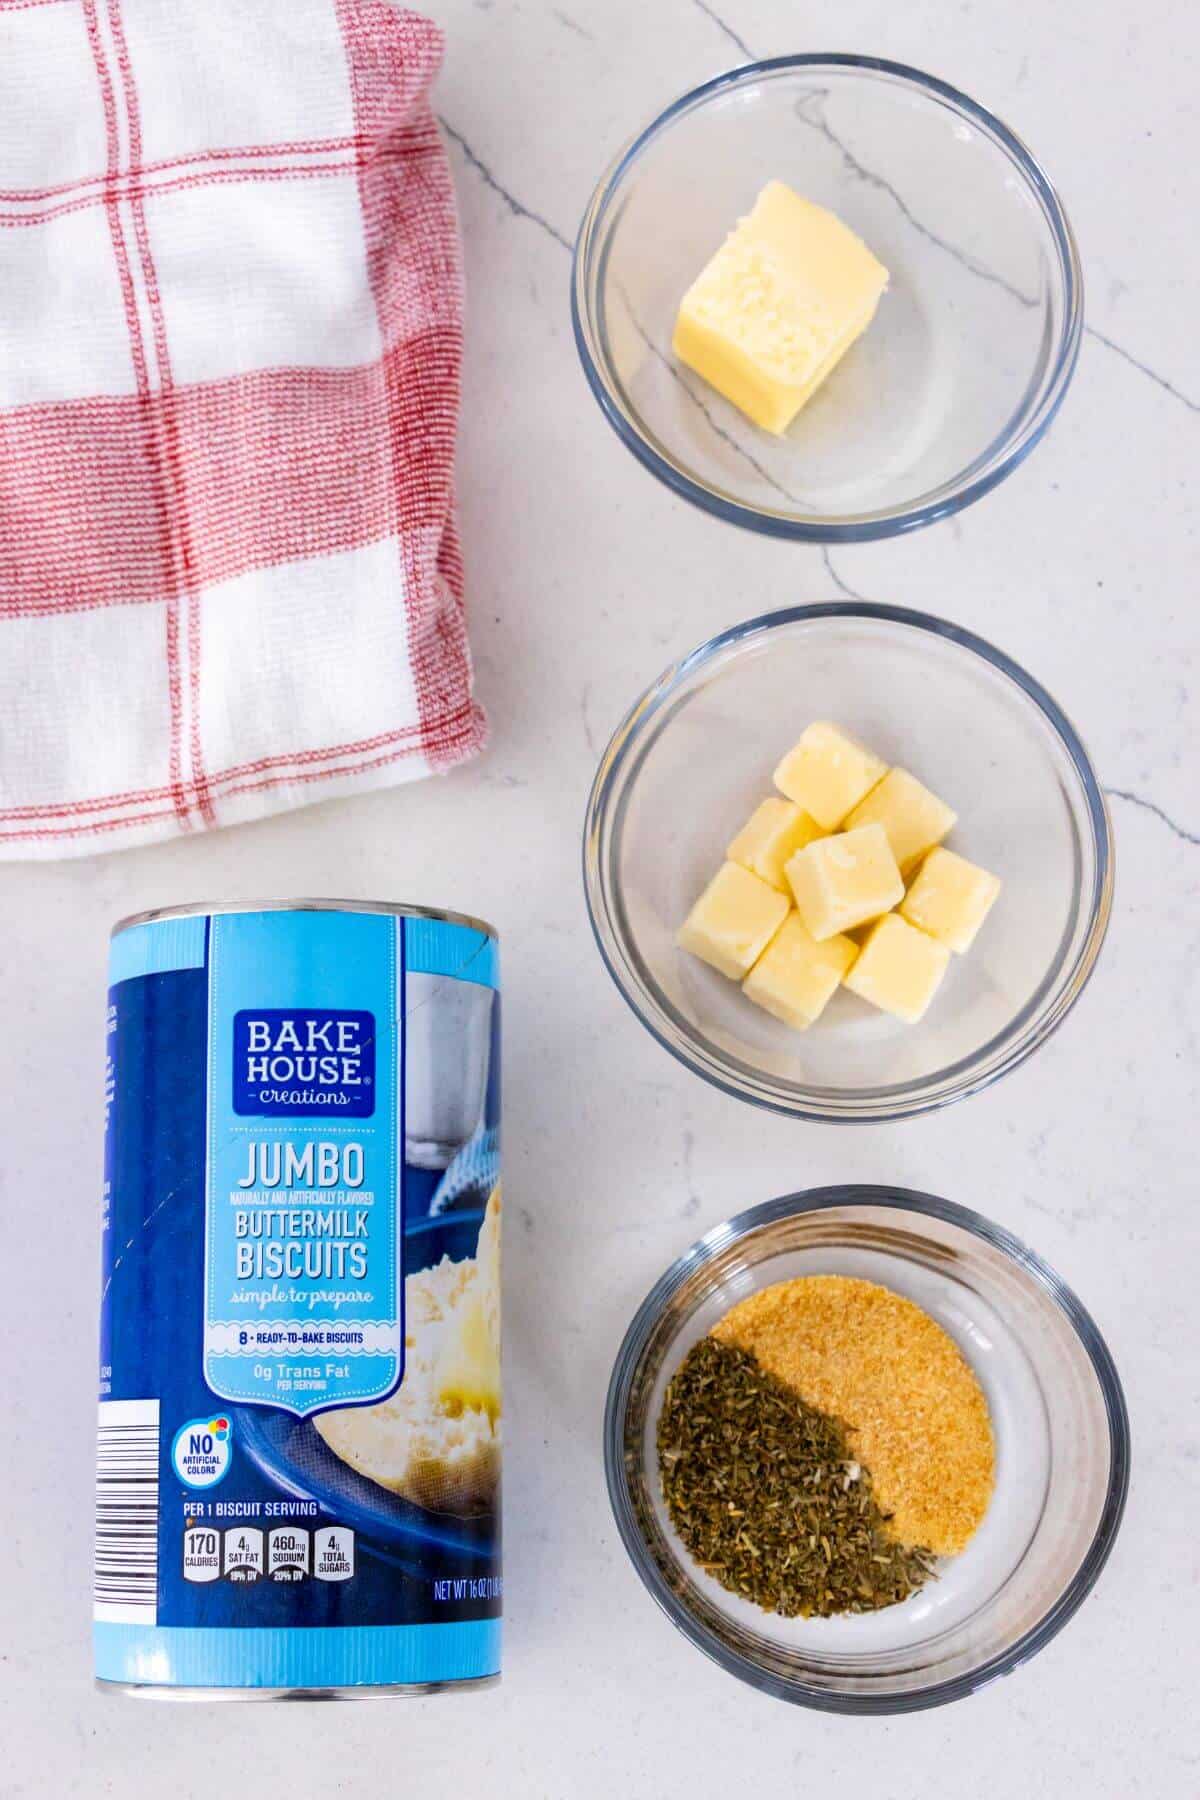
Here’s what you’ll need to make easy cheese stuffed biscuits:
- Refrigerated buttermilk biscuits – These provide a soft, flaky base that bakes up tender while keeping the recipe quick and approachable.
- Cheese cubes – The cheese melts inside the biscuits, creating a rich, gooey center with bold flavor in every bite.
- Salted butter – Melted butter adds moisture and richness while helping the biscuits brown and develop a savory finish.
- Italian seasoning – This blend adds herby depth and balances the richness of the cheese and butter.
- Garlic powder – Garlic powder brings a subtle savory flavor that enhances the biscuits without overpowering the cheese.
Tools you’ll need
Before starting the recipe, you’ll want to have all your kitchen essentials ready. I recommend having the following items:
Ways To Customize
Here are a few easy, no-stress ways to customize it and make it your own:
- Swap the cheese for mozzarella, pepper jack, Colby Jack, or smoked cheddar
- Add cooked bacon bits or diced ham inside for extra savory flavor
- Mix a pinch of red pepper flakes or Cajun seasoning into the butter for heat
- Brush with garlic butter and sprinkle Parmesan on top before baking
- Add chopped fresh herbs like parsley, chives, or rosemary after baking
- Serve with marinara, ranch, or honey butter for dipping
Be sure to check out the full recipe and ingredient list below.
How To Make It
Preheat the oven to 400 degrees Fahrenheit.
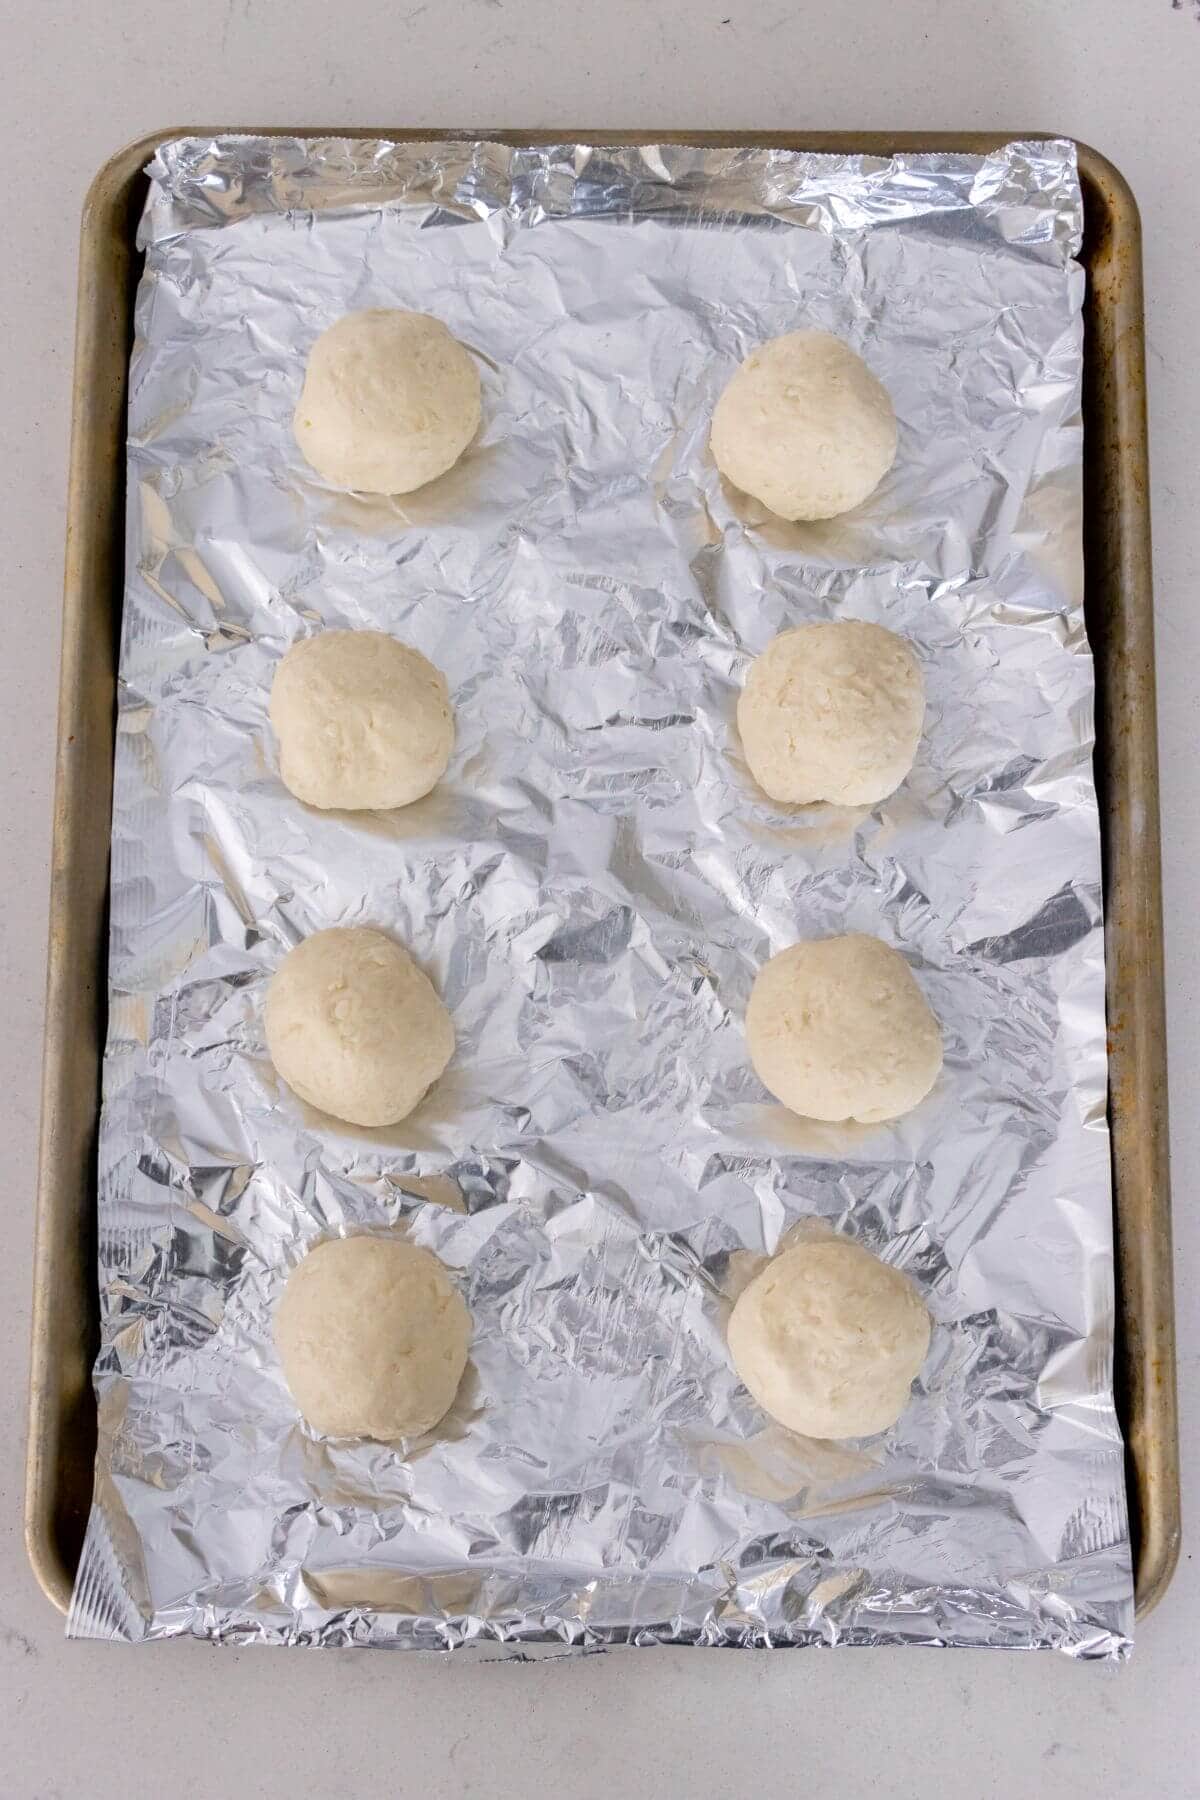
Remove the biscuits from the package. Separate and divide the biscuits. Flatten each biscuit.
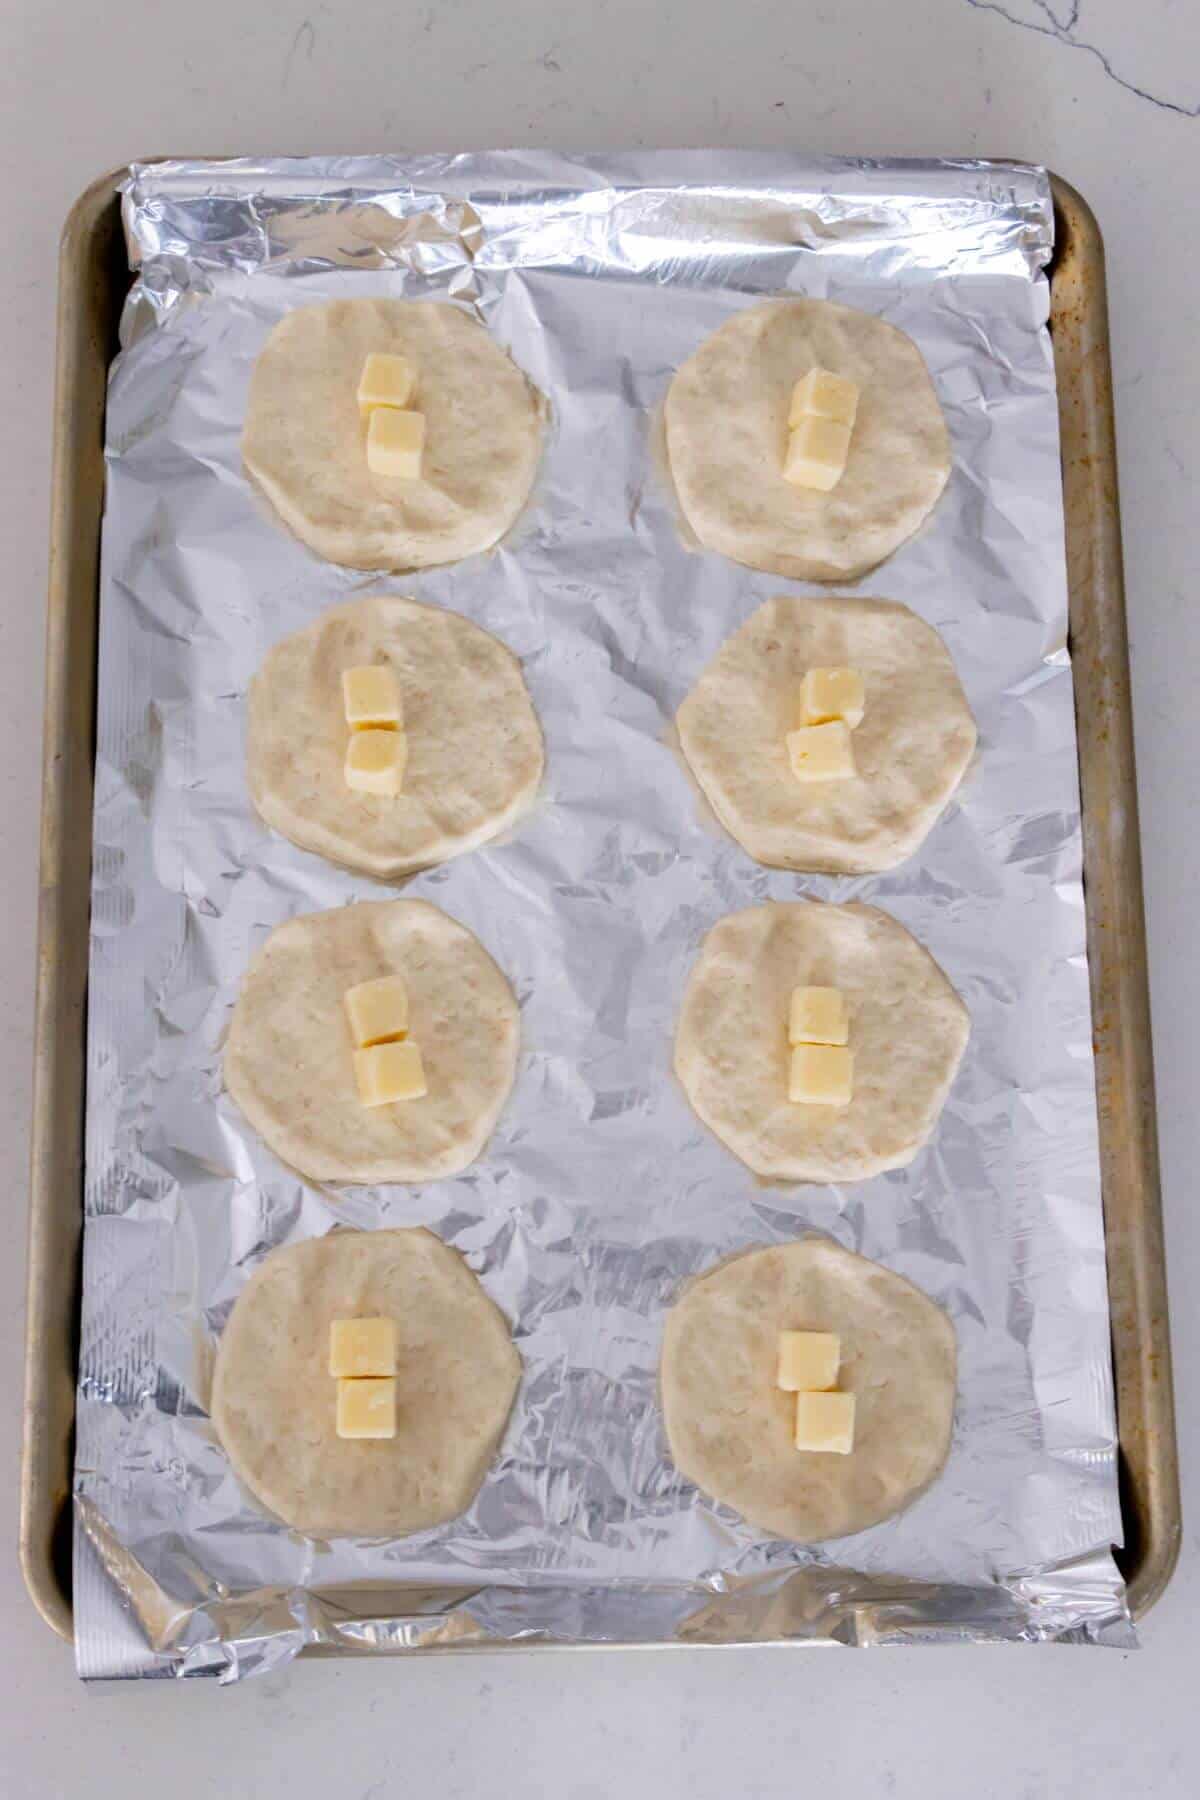
Place two cheese cubes into the center of each flattened biscuit dough piece. Fold the dough over the cheese and press the edges together to seal and form a sealed ball. Place the seam side down on the baking sheet.
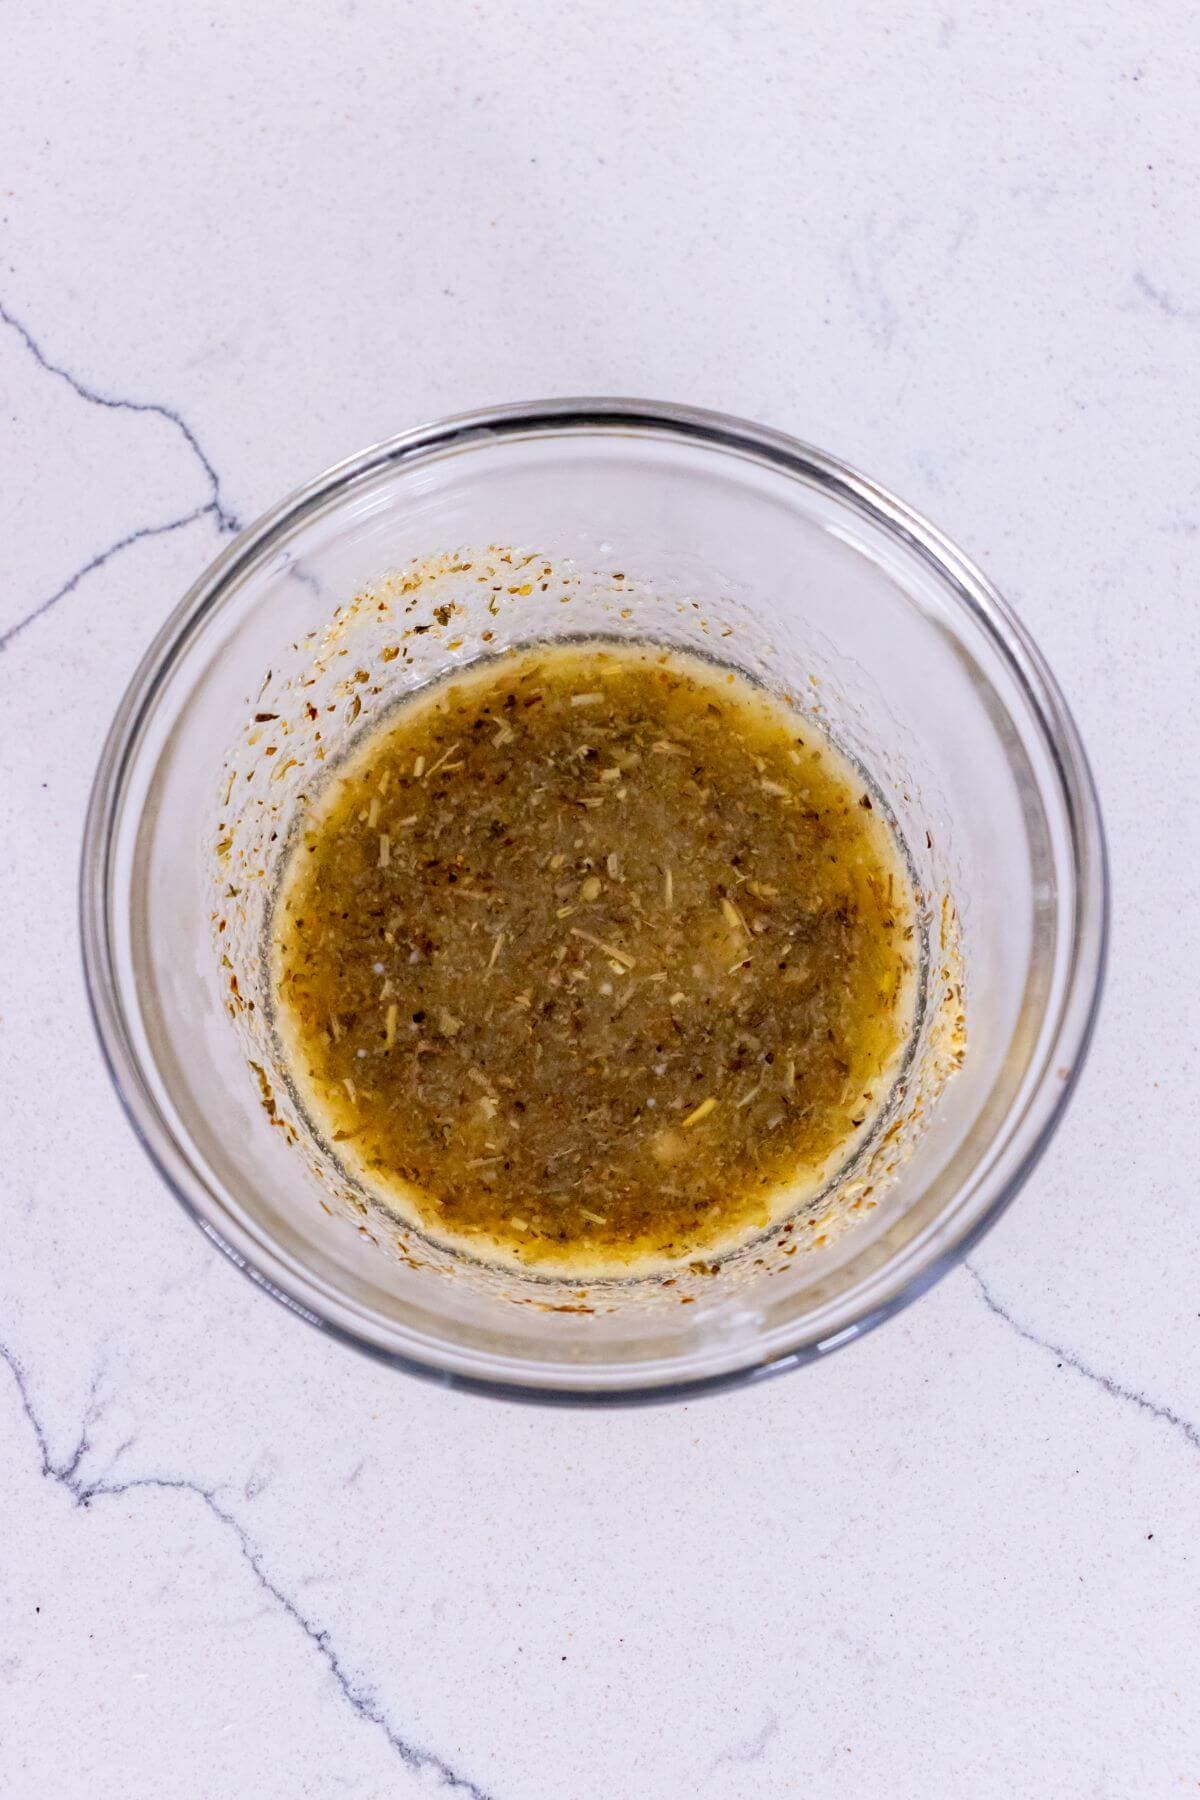
In a small bowl, melt the butter. Once the butter is melted, stir in Italian seasoning.
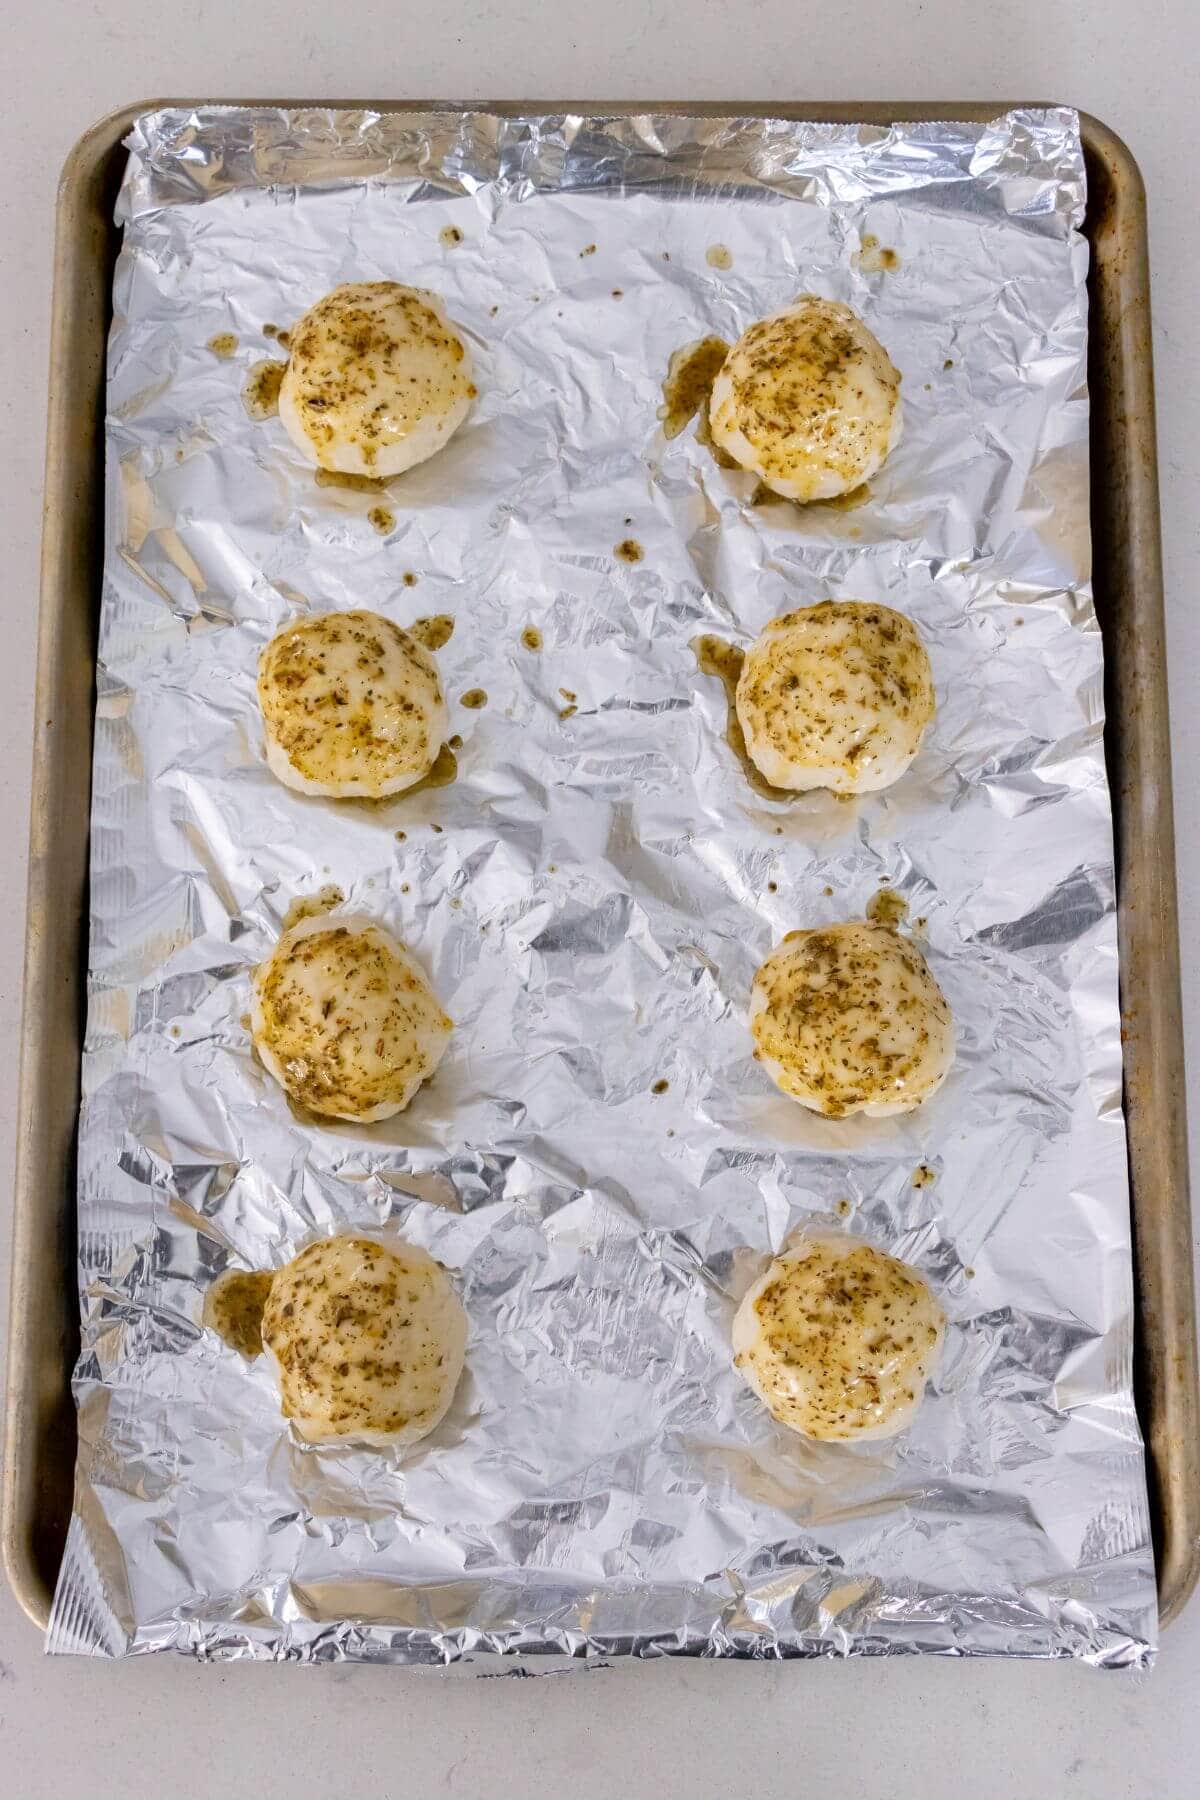
Apply the seasoned butter over the top of each dough ball using a pastry brush.
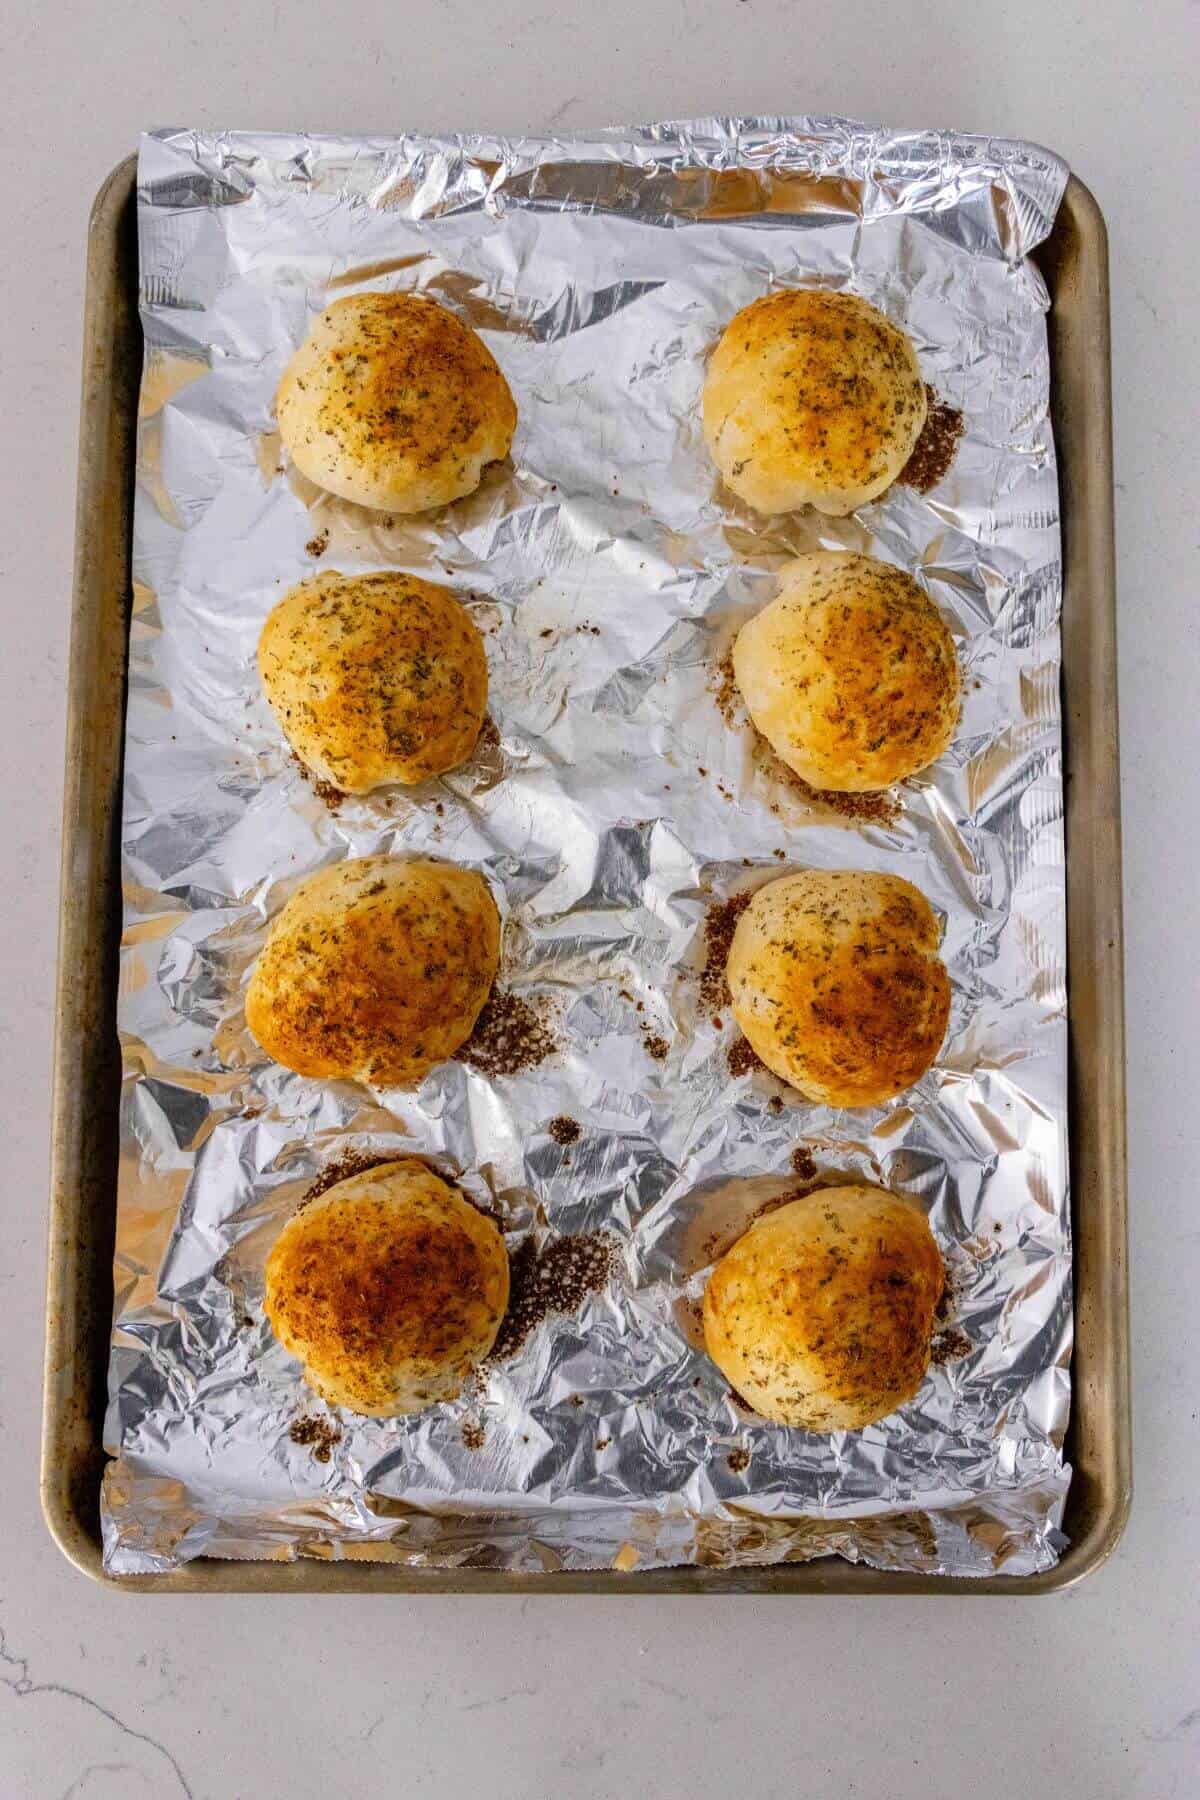
Bake for 8 to 10 minutes, or until the biscuits are golden brown on top.
Note
Make sure the biscuit dough is sealed tightly around the cheese so it doesn’t leak out while baking, and place the seam side down on the baking sheet for best results.

Storage
Store leftover cheese stuffed biscuits in an airtight container in the refrigerator for up to three days. To reheat, warm them in the oven or air fryer until heated through so the biscuits stay soft with a lightly crisp exterior; the microwave works in a pinch but may soften them more than desired.
Helpful Hints
Pro tip: Chill the Cheese!
Chill the cheese cubes briefly before stuffing the biscuits so they melt more slowly and stay inside instead of leaking out.
More cooking tips:
- Press the seams firmly and place them seam-side down on the baking sheet
- Use parchment paper for easier cleanup and even browning
- Don’t overbake or the biscuits can dry out
- Brush with butter as soon as they come out of the oven for extra flavor
- Let them cool slightly before serving so the cheese sets just enough
Serving Suggestions
These cheese stuffed biscuits are perfect alongside cozy, hearty meals, especially soups and stews. I love serving them warm with a bowl of Creamy Tomato Soup. They’re great for dunking, scooping, or just tearing apart between bites.
They also make an excellent side for simple protein-based dinners. I often serve them with French Onion Chicken because the buttery biscuits soak up all that rich, savory sauce beautifully. It turns an already comforting dinner into something that feels extra satisfying without adding much effort.
If you’re hosting or putting together a casual spread, these biscuits work well as a standalone appetizer too. I’ll set them out with a small dish of marinara, ranch, or even honey butter for dipping. They’re easy to grab, easy to eat, and always one of the first things to disappear from the table.
FAQs
Recipe

Cheese Stuffed Biscuits
Ingredients
- 1 tube of refrigerated buttermilk biscuits
- 16 cheese cubes I used sharp cheddar, but any cheese is fine
- 2 tablespoons of salted butter melted
- 1 teaspoon of Italian seasoning
- ½ teaspoon of garlic powder
Instructions
- Preheat the oven to 400 degrees Fahrenheit.
- Remove the biscuits from the package. Separate and divide the biscuits. Flatten each biscuit.
- Place two cheese cubes into the center of each flattened biscuit dough piece. Fold the dough over the cheese and press the edges together to seal and form a sealed ball. Place the seam side down on the baking sheet.
- In a small bowl, melt the butter. Once the butter is melted, stir in Italian seasoning. Apply the seasoned butter over the top of each dough ball using a pastry brush.
- Bake for 8 to 10 minutes, or until the biscuits are golden brown on top.